
When the sun shines bright and the days grow long, there’s nothing quite like the vibrant, fresh flavors of Mexican cuisine to liven up your summer meals. From lively fiestas to casual backyard barbecues, Mexican food, aromatic cilantro, and a touch of spice are practically synonymous with summertime enjoyment.
Get ready to embark on a culinary journey with our collection of 22 irresistible Summer Mexican recipes, designed to keep you cool, satisfied, and coming back for more.
1. Avocado Gazpacho with Jalapeño (Chilled & Creamy!)
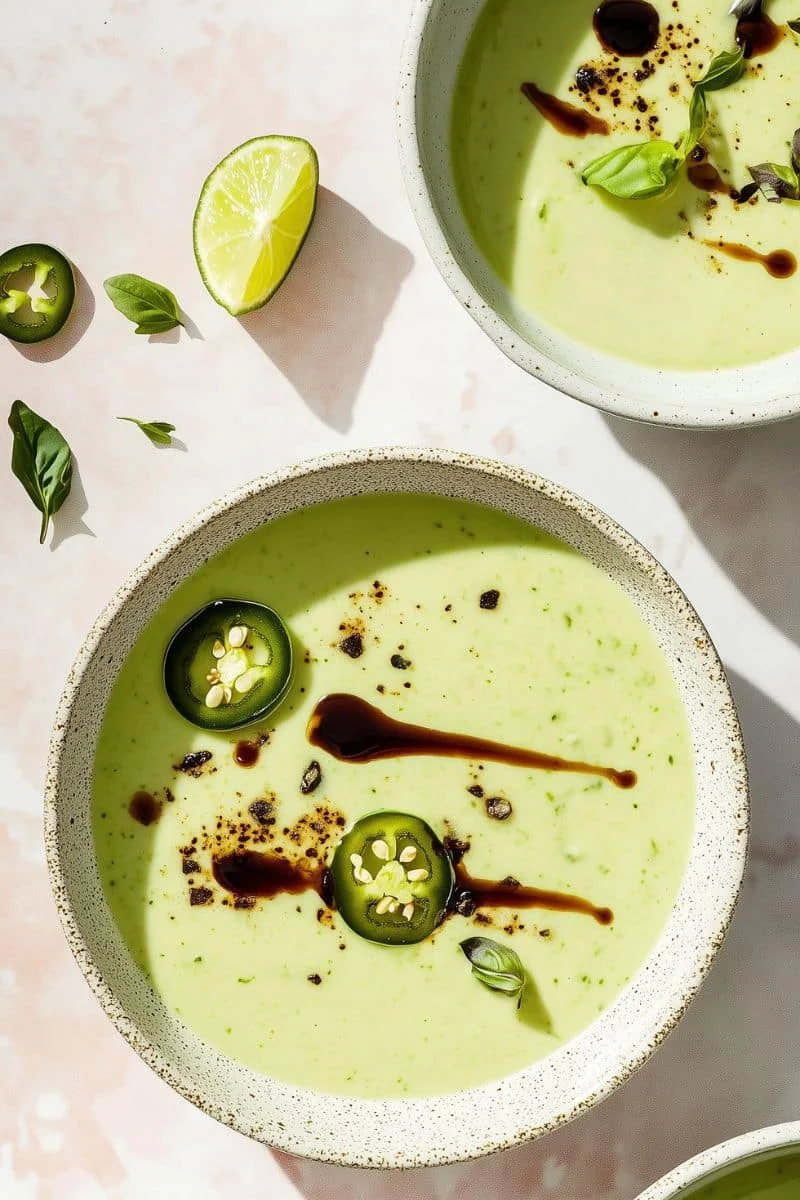
Avocado Gazpacho with Jalapeño (Chilled & Creamy!) is the ultimate refreshing solution for those sweltering summer days, offering a delightful no-cook option for a light lunch or appetizer. This vibrant green soup boasts a smooth and creamy texture thanks to ripe avocados.
Ingredients
- 2 large ripe avocados, halved, pitted, and flesh scooped out
- 1 medium cucumber, peeled, seeded, and roughly chopped
- 1/2 small jalapeño pepper, seeds and membrane removed for less heat (use more or keep seeds for extra spice)
- 1/2 cup fresh cilantro leaves and tender stems, loosely packed
- 1/4 cup chopped green onions or mild white onion
- 1-2 cloves garlic, roughly chopped
- 1/4 cup freshly squeezed lime juice (from about 1-2 limes)
- 1 ½ cups cold vegetable broth or cold filtered water
- 1/2 teaspoon salt, or more to taste
- 1/4 teaspoon freshly ground black pepper, or more to taste
- Optional garnishes: Diced avocado, finely chopped cilantro, a drizzle of extra virgin olive oil, a sprinkle of chili flakes, or a dollop of crema fresca.
Instructions
- Place the scooped avocado flesh into the jar of a high-speed blender.
- Add the peeled, seeded, and roughly chopped cucumber to the blender and the avocado.
- Add the prepared jalapeño (starting with a smaller amount if you are sensitive to spice), the loosely packed fresh cilantro, the chopped green onions (or white onion), and the roughly chopped garlic cloves to the blender.
- Pour in the freshly squeezed lime juice and the cold vegetable broth (or cold filtered water).
- Season the mixture in the blender with the initial salt and freshly ground black pepper.
- Secure the lid tightly on the blender. Blend on high speed for 1 to 2 minutes, or until the gazpacho is completely smooth, velvety, and creamy, with no visible chunks remaining.
- Once blended, taste the Avocado Gazpacho. Adjust the seasonings according to your preference. You might want to add more salt for flavor, more lime juice for tanginess, or a little more jalapeño if you desire a spicier kick.
- If the gazpacho is thicker than you’d like, you can blend in a little more cold vegetable broth or water, a tablespoon at a time, until it reaches your preferred consistency.
- After adjusting the flavors and consistency, pour the finished gazpacho into an airtight container. Cover and refrigerate for at least 30 minutes to 1 hour. This chilling time allows the soup to become thoroughly cold and also helps the flavors to meld together beautifully.
- When you are ready to serve, ladle the chilled Avocado Gazpacho with Jalapeño into individual bowls or glasses.
- If desired, enhance its presentation and taste with optional garnishes such as a few pieces of finely diced avocado, some freshly chopped cilantro, a delicate drizzle of extra virgin olive oil, a tiny sprinkle of chili flakes for color, or a small dollop of Mexican crema fresca.
2. Chicken Tinga Lettuce Wraps (Low-Carb & Saucy!)
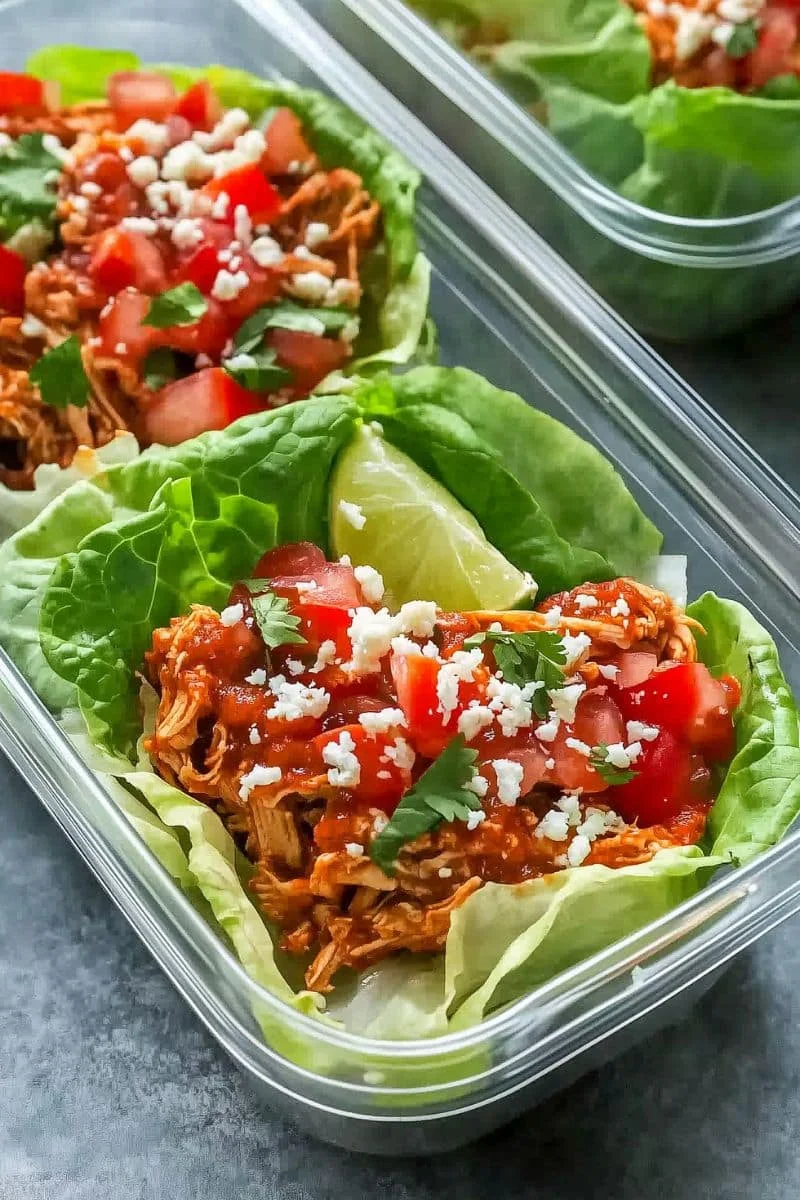
Chicken Tinga Lettuce Wraps (Low-Carb & Saucy!) offer a vibrant taste of Mexico. This dish features tender, smoky chipotle chicken generously wrapped in crisp lettuce leaves. It’s a wonderfully light yet deeply flavorful and satisfying protein-packed meal option.
Ingredients
- 1 lb boneless, skinless chicken breasts or thighs, cooked and shredded
- 1 tablespoon olive oil
- 1/2 medium onion, thinly sliced
- 2 cloves garlic, minced
- 1 (14.5 oz) can of diced tomatoes, undrained
- 2-3 chipotle peppers in adobo sauce, minced (plus 1 tablespoon of the adobo sauce)
- 1/2 cup chicken broth
- 1/2 teaspoon dried oregano (Mexican oregano preferred)
- 1/4 teaspoon ground cumin
- Salt and freshly ground black pepper to taste
- 8-12 large lettuce leaves (e.g., butter lettuce, romaine, or iceberg) for serving as wraps
- Optional toppings: Crumbled cotija or queso fresco, chopped fresh cilantro, lime wedges, sliced avocado, thinly sliced radishes.
Instructions
- Ensure chicken is cooked and shredded; set aside (poach, boil, or use rotisserie).
- Heat olive oil in a large skillet or pan over medium heat.
- Add thinly sliced onion; sauté for 3-5 minutes until softened and translucent.
- Stir in minced garlic; cook for an additional 1 minute until fragrant.
- Add diced tomatoes, minced chipotle peppers, adobo sauce, and chicken broth.
- Stir in dried oregano, ground cumin, salt, and pepper; bring to a simmer.
- Add the pre-cooked shredded chicken to the simmering sauce in the skillet.
- Stir well to ensure all the chicken is evenly coated with the tinga sauce.
- Reduce heat to low, cover the skillet, and let simmer gently for 10-15 minutes.
- This allows the smoky chipotle flavors to infuse deeply into the chicken.
- If the sauce is too thin after simmering, remove the lid and cook for 5 more minutes.
- Prepare lettuce leaves by washing and patting them thoroughly dry.
- Spoon the warm, saucy chicken tinga mixture into the crisp lettuce cups.
- Garnish your low-carb chicken tinga lettuce wraps with desired optional toppings and serve.
3. Chili Lime Shrimp Tacos with Avocado Slaw (Spicy & Crisp!)
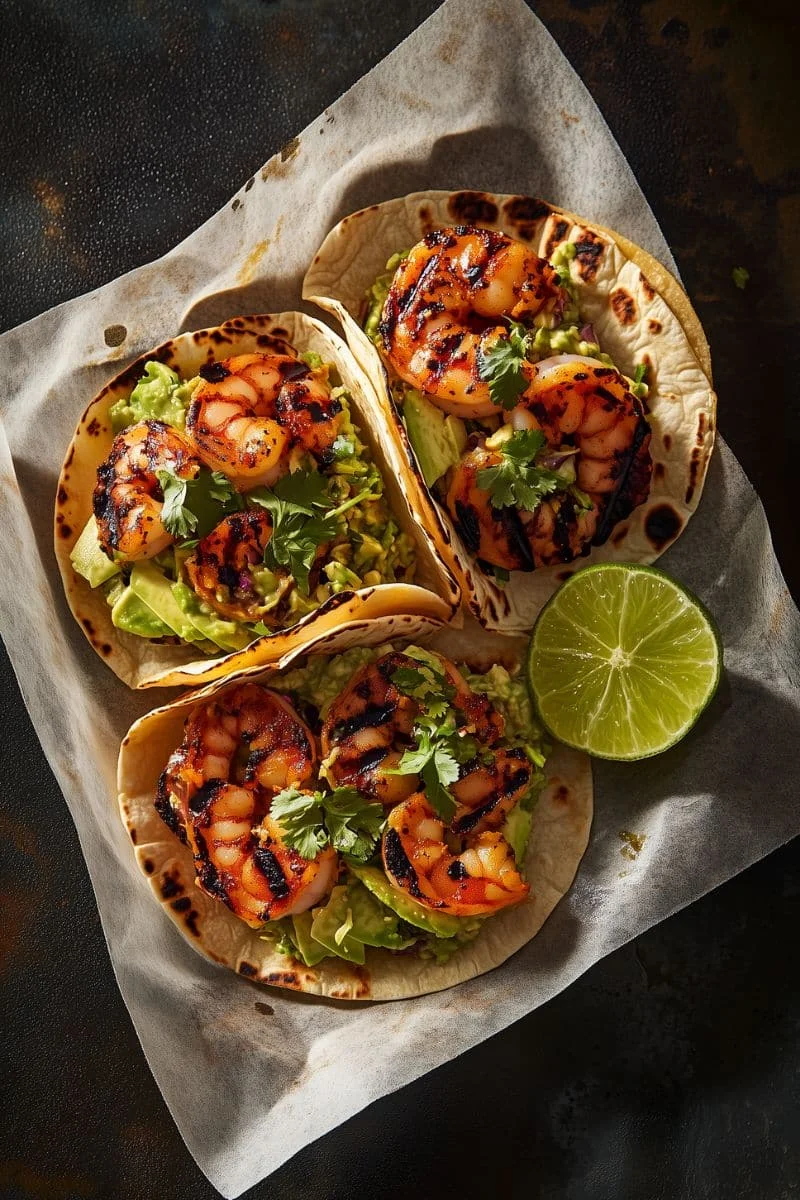
Chili Lime Shrimp Tacos with Avocado Slaw (Spicy & Crisp!) are a true summer delight. These tacos feature succulent, juicy shrimp with a zesty chili-lime kick. Paired perfectly with a crunchy, creamy avocado slaw and soft, warm tortillas. They make for the ultimate fresh, flavorful, and satisfying summer taco experience.
Ingredients
For the Chili Lime Shrimp:
- 1 lb large shrimp, peeled, deveined, and tails removed
- 1 tablespoon olive oil
- 1 tablespoon fresh lime juice
- 1 teaspoon chili powder (adjust to your spice preference)
- 1/2 teaspoon ground cumin
- 2 cloves garlic, minced
- Salt and freshly ground black pepper to taste
- 2 cups shredded cabbage or pre-made coleslaw mix
- 1 ripe avocado, diced
- 1/4 cup chopped fresh cilantro
- 2 tablespoons fresh lime juice
- Salt to taste
- 8-12 small corn or flour tortillas
- Optional toppings: Crumbled cotija cheese or queso fresco, extra chopped cilantro, lime wedges, your favorite hot sauce.
Instructions
- In a medium bowl, combine shrimp with olive oil, 1 tbsp lime juice, chili powder, cumin, garlic, salt, and pepper.
- Toss well to coat; let the shrimp marinate for at least 10-15 minutes.
- For avocado slaw: In a separate bowl, gently mix shredded cabbage, diced avocado, and cilantro.
- Drizzle slaw mixture with 2 tbsp fresh lime juice; season with salt and toss lightly.
- Heat a large skillet or grill pan over medium-high heat until hot.
- Add marinated shrimp in a single layer; cook for 2-3 minutes per side.
- Cook until shrimp are pink, opaque, and cooked through; do not overcook.
- Warm the corn or flour tortillas briefly on the skillet, in a dry pan, or microwave.
- To assemble, fill each warm tortilla with a generous portion of the avocado slaw.
- Arrange several pieces of the cooked chili lime shrimp on top of the slaw.
- Garnish with optional cotija cheese, extra cilantro, and a squeeze of fresh lime if desired.
- Serve these spicy and crisp shrimp tacos immediately for an ultimate summer meal.
4. Chorizo and Pineapple Skewers (Grilled & Bold!)
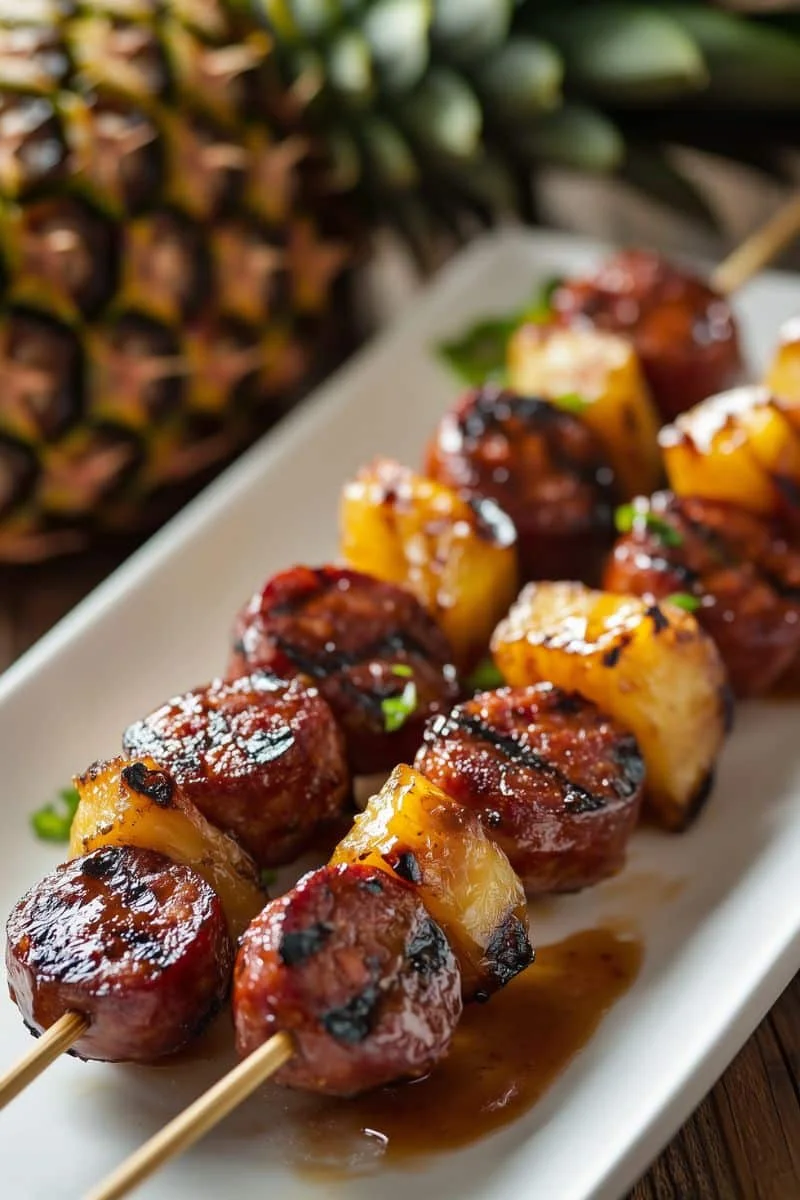
Chorizo and Pineapple Skewers (Grilled & Bold!) deliver an explosion of flavor. These easy skewers perfectly balance sweet, juicy pineapple with smoky, spicy chorizo. They are a guaranteed fiery and fun hit at any summer cookout or barbecue.
Ingredients
- 8 oz firm Spanish chorizo sausage (cured type), sliced into 1/2-inch thick rounds
- 1 fresh pineapple, peeled, cored, and cut into 1-inch chunks
- 1 red bell pepper, cut into 1-inch pieces (optional, for color and crunch)
- 1 green bell pepper, cut into 1-inch pieces (optional, for color and crunch)
- 1 small red onion, cut into 1-inch wedges (optional)
- Wooden or metal skewers (soak wooden skewers in water for at least 30 minutes)
- Optional glaze: 1 tablespoon olive oil mixed with 1 teaspoon smoked paprika or chili powder
Instructions
- If using wooden skewers, ensure they are soaked in water for 30 minutes before use.
- Prepare your ingredients: slice chorizo, cut the pineapple into chunks, and chop vegetables if using.
- Alternately thread the chorizo slices, pineapple chunks, and optional bell pepper/onion pieces onto skewers.
- Aim for a balanced distribution of ingredients on each skewer for best results.
- Preheat your outdoor grill or an indoor grill pan to medium-high heat.
- If desired, lightly brush the assembled skewers with the optional olive oil and paprika glaze.
- Carefully place the prepared skewers onto the hot grill grates or grill pan.
- Grill for approximately 3-5 minutes on each side, turning occasionally.
- Cook until the chorizo is heated through and has slightly crispy edges.
- The pineapple should be nicely grill-marked, tender, and slightly caramelized.
- Once cooked, remove the skewers from the grill and let them rest briefly.
- Serve these bold and flavorful chorizo and pineapple skewers warm as a fun cookout hit.
5. Cilantro Lime Rice Bowls with Grilled Veggies (Fresh & Plant-Based!)

Cilantro Lime Rice Bowls with Grilled Veggies offer a fresh and plant-based delight. Build your own nourishing and vibrant bowl featuring zesty cilantro-lime rice. It’s topped with colorful, smoky grilled summer vegetables for incredible flavor.
Ingredients
- 1 cup cooked rice (white, brown, or quinoa)
- 1/4 cup finely chopped fresh cilantro
- 2 tablespoons fresh lime juice
- Salt to taste
- 2 cups mixed summer vegetables, chopped (e.g., bell peppers, zucchini, corn, red onion)
- 1 tablespoon olive oil
- Salt and freshly ground black pepper to taste
- 1 cup cooked black beans or pinto beans (rinsed and drained), grilled tofu, or crumbled tempeh
- Salsa (pico de gallo, salsa verde), diced avocado or guacamole, extra fresh cilantro, lime wedges.
Instructions
- Prepare cilantro lime rice: In a bowl, combine freshly cooked rice with cilantro, lime juice, and salt.
- Chop your selected summer vegetables into uniform, grill-friendly pieces.
- Toss the chopped vegetables in a bowl with olive oil, salt, and pepper.
- Preheat your grill or a grill pan to medium-high heat.
- Grill the seasoned vegetables for 5-10 minutes, turning occasionally for even char.
- Cook until vegetables are tender-crisp and have visible grill marks.
- To assemble each bowl, create a base layer of the cilantro lime rice.
- Arrange a generous portion of the colorful grilled vegetables over the rice.
- Add your choice of optional plant-based protein like black beans or grilled tofu.
- Finish with desired toppings such as fresh salsa, avocado, or a squeeze of lime.
- Serve these fresh and vibrant cilantro lime rice bowls warm or at room temperature.
6. Fresh Guacamole with Charred Corn (Creamy Meets Crunchy!)
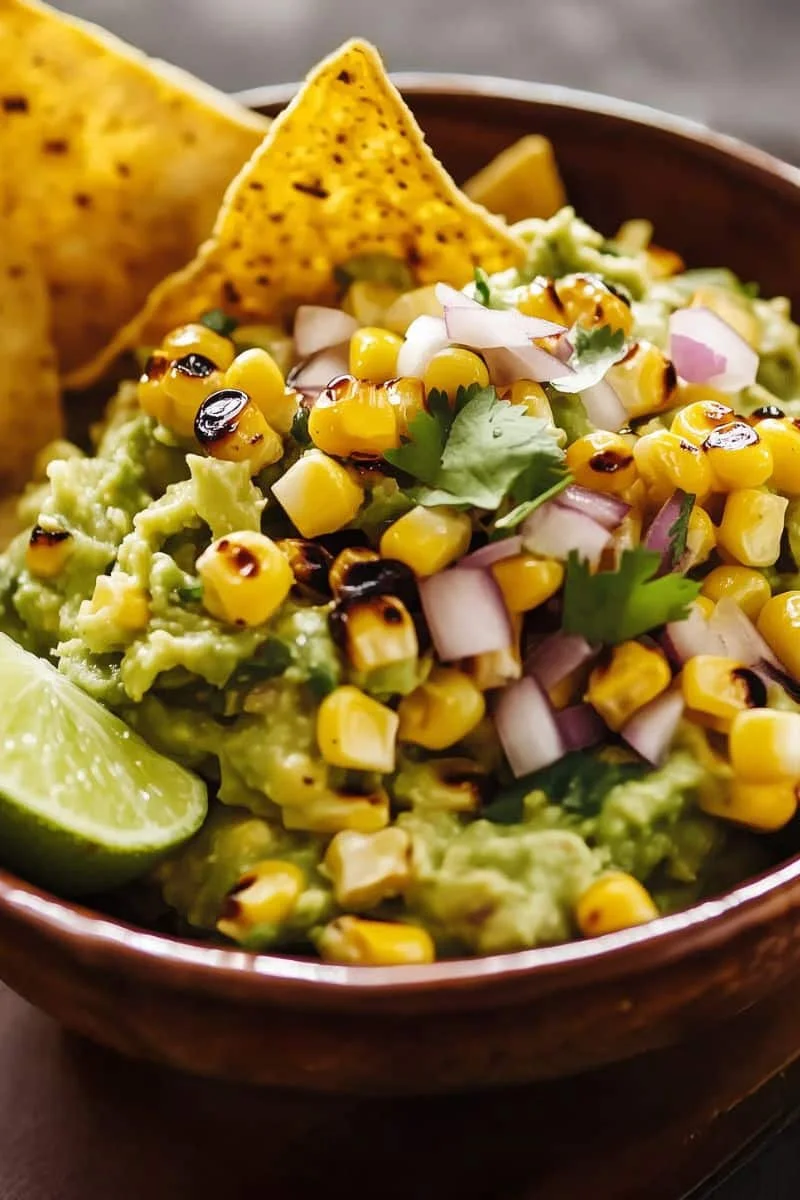
Fresh Guacamole with Charred Corn offers a creamy meets crunchy experience. This vibrant summer twist on classic guacamole is truly a crowd-pleaser for any event. Charred corn kernels introduce a fantastic smoky sweetness and satisfying texture.
Ingredients
- 3 ripe avocados, halved and pitted
- 1 ear of fresh corn, husks, and silk removed
- 1/4 cup finely diced red onion
- 1/4 cup chopped fresh cilantro
- 1-2 tablespoons fresh lime juice (adjust to taste)
- 1 small jalapeño pepper, minced (optional, seeds removed for less heat)
- Salt to taste
- Tortilla chips or fresh vegetable sticks, for serving
Instructions
- Char fresh corn: Grill or broil the ear of corn until kernels are lightly blackened.
- Alternatively, pan-char corn kernels in a hot, dry skillet until blistered and fragrant.
- Allow charred corn to cool slightly, then carefully cut kernels from the cob.
- Scoop avocado flesh into a medium bowl; mash with a fork to the desired consistency.
- Add the prepared charred corn kernels, diced red onion, and chopped cilantro to the avocado.
- Stir in fresh lime juice and the minced jalapeño (if you are using it).
- Season the guacamole generously with salt according to your taste preference.
- Gently mix all ingredients until just combined; avoid over-mashing.
- Taste and adjust seasonings (more lime juice, salt, or jalapeño) as needed.
- Serve this fresh guacamole with charred corn immediately with tortilla chips.
- If storing briefly, press plastic wrap directly onto the guacamole surface to prevent browning.
7. Frozen Horchata Latte (Creamy & Caffeinated!)

Frozen Horchata Latte (Creamy & Caffeinated!) is your ultimate summer coffee indulgence. This icy, sweet pick-me-up perfectly blends traditional cinnamon-rice horchata with bold espresso. It’s incredibly creamy, and refreshing, and provides that much-needed caffeine boost.
Ingredients
- 1 cup prepared horchata, chilled (store-bought or your favorite homemade recipe)
- 1-2 shots freshly brewed espresso or 1/2 cup strong brewed coffee, chilled
- 1 cup ice cubes (use more for a thicker consistency)
- Optional: Sweetener to taste (e.g., agave nectar or simple syrup, if horchata or coffee are unsweetened)
- Optional Garnish: A sprinkle of ground cinnamon or a dollop of whipped cream
Instructions
- Ensure your prepared horchata and espresso (or strong coffee) are thoroughly chilled.
- Combine the chilled horchata, chilled espresso/coffee, and ice cubes in a blender.
- If desired, add your preferred sweetener to the blender at this stage.
- Secure the blender lid tightly to prevent any splashes.
- Blend on high speed until the mixture is smooth, icy, and has a thick, slushy texture.
- Check the consistency; add more ice for a thicker latte or a little more horchata if too thick.
- If adjustments are made, blend again briefly to incorporate fully.
- Pour the finished frozen horchata latte immediately into a tall serving glass.
- If using, garnish with a light sprinkle of ground cinnamon or whipped cream.
- Serve this creamy and caffeinated frozen Mexican drink right away for perfect refreshment.
8. Frozen Paloma Cocktail (Grapefruit, Tequila & Ice!)

Frozen Paloma Cocktail (Grapefruit, Tequila & Ice!) is a vibrant, icy summer sensation. This delightful frozen version of the classic Paloma is perfectly citrusy and boozy. It offers an extra refreshing way to enjoy tequila, fresh grapefruit, and zesty lime.
Ingredients
- 2 oz tequila blanco (silver tequila)
- 3 oz fresh grapefruit juice, chilled
- 1/2 oz fresh lime juice, chilled
- 1/2 oz agave nectar or simple syrup (adjust to your sweetness preference)
- 1.5 – 2 cups ice cubes
- Optional: Salt for rimming the glass
- Optional Garnish: A thin slice of grapefruit or a lime wheel
Instructions
- If desired, prepare your serving glass by moistening the rim and dipping it in salt.
- Combine the tequila blanco, chilled fresh grapefruit juice, and chilled lime juice in a blender.
- Add the agave nectar or simple syrup to the blender along with the juices.
- Add 1.5 to 2 cups of ice cubes to the liquid ingredients in the blender.
- Secure the blender lid firmly to prevent any spillage during blending.
- Blend on high speed until the mixture is completely smooth, thick, and has a slushy texture.
- If the cocktail consistency is too thin, add a few more ice cubes and briefly blend again.
- If it appears too thick, add a very small splash of grapefruit juice and blend.
- Pour the freshly blended frozen Paloma mixture immediately into your prepared chilled glass.
- Garnish with a fresh grapefruit slice or a lime wheel on the rim, if desired.
- Serve this extra refreshing frozen tequila cocktail right away to enjoy at its best.
9. Grilled Fish Tacos with Cilantro Lime Crema (Light & Flavorful!)

Grilled Fish Tacos with Cilantro Lime Crema are exceptionally light and flavorful. These delightful tacos feature tender, flaky grilled fish as the star ingredient. A bright, zesty cilantro lime crema and crisp toppings complete this perfect dish.
Ingredients
- 1 lb firm white fish fillets (e.g., cod, tilapia, mahi-mahi), cut into 2-inch pieces or strips
- 1 tablespoon olive oil
- 1 tablespoon fresh lime juice
- 1 teaspoon chili powder
- 1/2 teaspoon ground cumin
- Salt and freshly ground black pepper to taste
- 1/2 cup sour cream, plain Greek yogurt, or Mexican crema
- 1/4 cup finely chopped fresh cilantro
- 1 tablespoon fresh lime juice
- 1 small clove of garlic, minced (optional)
- Salt to taste
- 8-12 small corn or flour tortillas
- Shredded cabbage or lettuce, diced tomatoes, sliced avocado, crumbled cotija cheese (optional toppings)
Instructions
- In a shallow dish, combine fish pieces with olive oil, 1 tbsp lime juice, chili powder, cumin, salt, and pepper.
- Toss gently to coat; let the fish marinate for at least 10-15 minutes.
- Prepare crema: In a small bowl, whisk sour cream/yogurt, cilantro, 1 tbsp lime juice, optional garlic, and salt.
- Chill the cilantro lime crema in the refrigerator while the fish grills.
- Preheat your outdoor grill or an indoor grill pan to medium-high heat.
- Ensure grill grates are clean and lightly oiled to prevent sticking.
- Place marinated fish pieces on the hot grill; cook for 3-4 minutes per side.
- Grill until fish is opaque, cooked through, and flakes easily with a fork.
- Warm tortillas for a few seconds per side on the grill or a dry skillet.
- Assemble tacos: Fill each warm tortilla with a portion of the grilled fish.
- Top with shredded cabbage or lettuce and any other desired crisp toppings.
- Drizzle generously with the cilantro lime crema; serve these flavorful fish tacos immediately.
10. Grilled Mexican Street Corn (Elote with a Twist!)
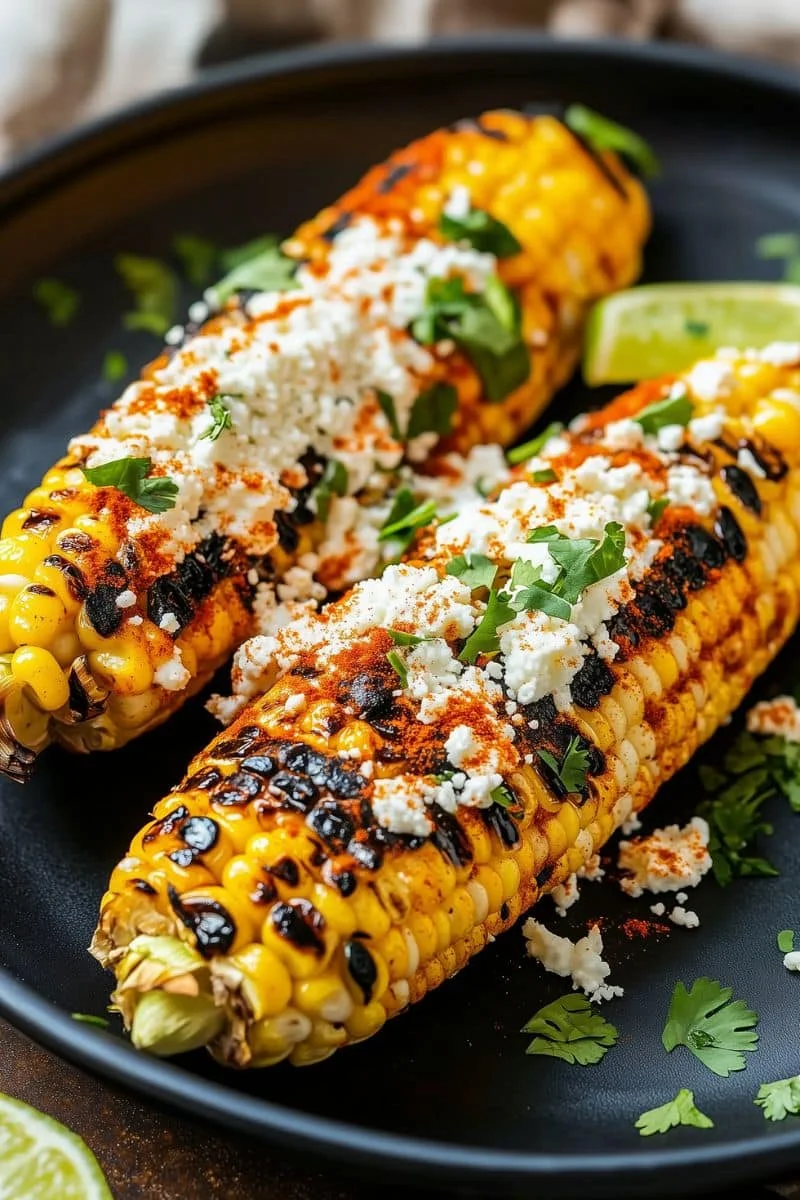
Grilled Mexican Street Corn (Elote with a Twist!) is an iconic summer treat. Fresh ears of corn are charred to sweet perfection on the open grill. Then, they’re generously slathered in a creamy, zesty, and slightly spicy sauce.
Ingredients
- 4 ears of fresh corn, husks, and silk removed
- 1/4 cup mayonnaise
- 1/4 cup crumbled cotija cheese (or feta cheese as a close substitute)
- 1/2 teaspoon chili powder (use ancho or chipotle for a smoky twist; adjust to taste)
- 1 tablespoon fresh lime juice
- 2 tablespoons finely chopped fresh cilantro
- Optional “twist”: A pinch of smoked paprika or 1 small clove of garlic, minced and mixed into the mayonnaise.
- Wooden skewers or corn holders (optional, for easier handling)
Instructions
- Preheat your outdoor grill or an indoor grill pan to medium-high heat.
- Place the husked ears of fresh corn directly onto the hot grill grates.
- Grill the corn for approximately 10-15 minutes, turning it occasionally with tongs.
- Cook until the corn kernels are tender and nicely charred in various spots.
- While corn is grilling, prepare to coat: In a small bowl, mix mayonnaise with lime juice (and optional garlic/paprika).
- Place crumbled cotija cheese on a shallow plate or another small dish.
- Have the chili powder and chopped cilantro ready in separate small dishes for easy access.
- Once the corn is perfectly grilled, carefully remove it from the heat (insert skewers now if using).
- While the corn is still hot, generously brush or spread it all over with the mayonnaise mixture.
- Immediately roll each mayonnaise-coated ear of corn in the crumbled cotija cheese until well covered.
- Sprinkle the cheese-coated corn evenly with chili powder to your desired heat level.
- Finish by garnishing with a sprinkle of freshly chopped cilantro.
- Serve this delicious grilled Mexican street corn (elite) immediately for the ultimate summer flavor.
11. Grilled Quesadillas with Summer Veggies (Melty & Colorful!)
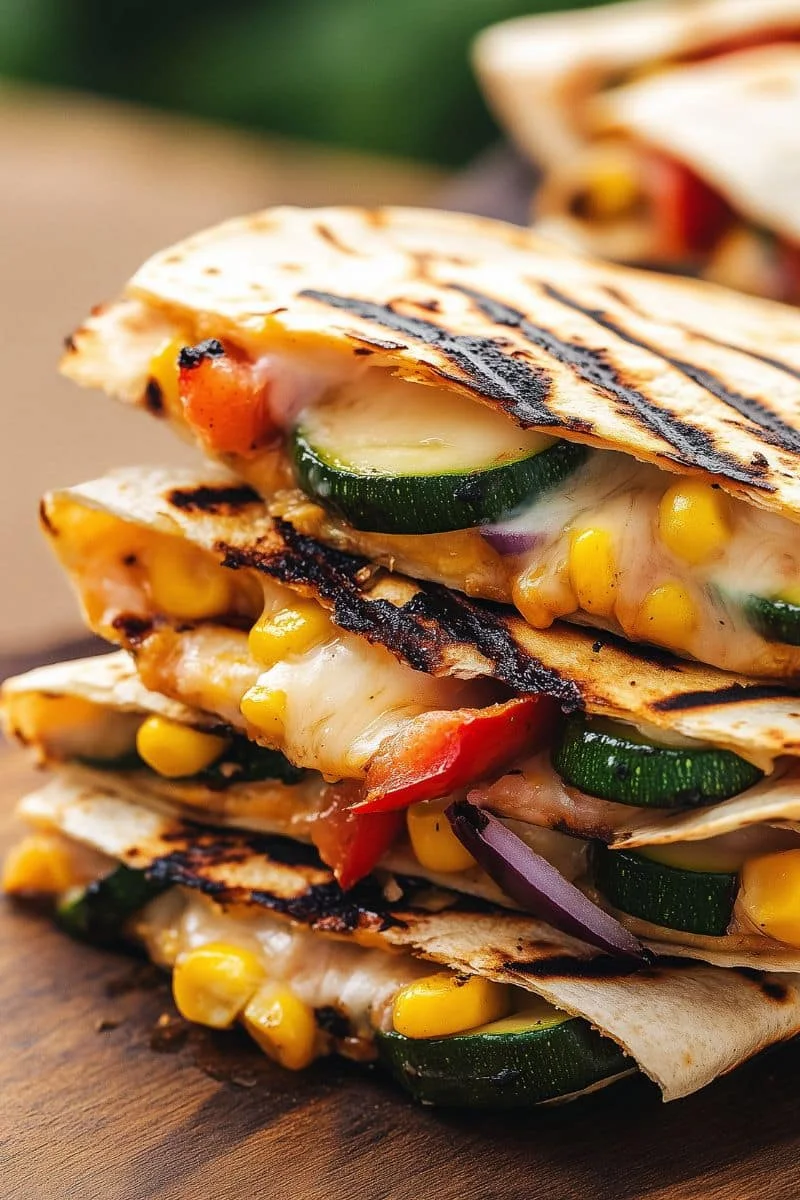
Grilled Quesadillas with Summer Veggies bring a melty and colorful flair to outdoor cooking. Take your quesadilla game outside by grilling them for a smoky, delicious char. Stuff them with seasonal summer squash, sweet corn, and plenty of gooey, melty cheese.
Ingredients
- 4 large flour tortillas
- 1 ½ cups shredded Monterey Jack, cheddar, or a Mexican cheese blend
- 1 cup cooked summer vegetables (e.g., grilled or sautéed diced zucchini, yellow squash, corn kernels, diced bell peppers)
- Optional: 1/2 cup cooked black beans, rinsed and drained
- Olive oil or melted butter, for brushing the tortillas
- For serving: Salsa, sour cream, or guacamole
Instructions
- Ensure summer vegetables (squash, corn, peppers) are pre-cooked until tender-crisp; set aside.
- Preheat your outdoor grill or an indoor grill pan to a medium heat setting.
- Lay out one flour tortilla; sprinkle shredded cheese over one entire half of it.
- Evenly distribute a portion of the cooked summer vegetables (and optional black beans) over the cheese.
- Add a little more shredded cheese on top of the vegetable layer if desired.
- Fold the empty half of the tortilla over the filling, pressing down gently.
- Lightly brush the outer surfaces of the folded quesadilla with olive oil or melted butter.
- Carefully place the prepared quesadilla onto the hot grill or grill pan.
- Grill for about 2-4 minutes on the first side, until golden brown and grill marks appear.
- Flip carefully with a spatula; grill the other side for another 2-3 minutes.
- Continue grilling until the tortilla is crispy and all the cheese is thoroughly melted.
- Remove from grill, let rest for a moment, then slice into wedges and serve hot.
12. Lime & Chili Roasted Chickpeas (Crunchy Mexican Snack!)
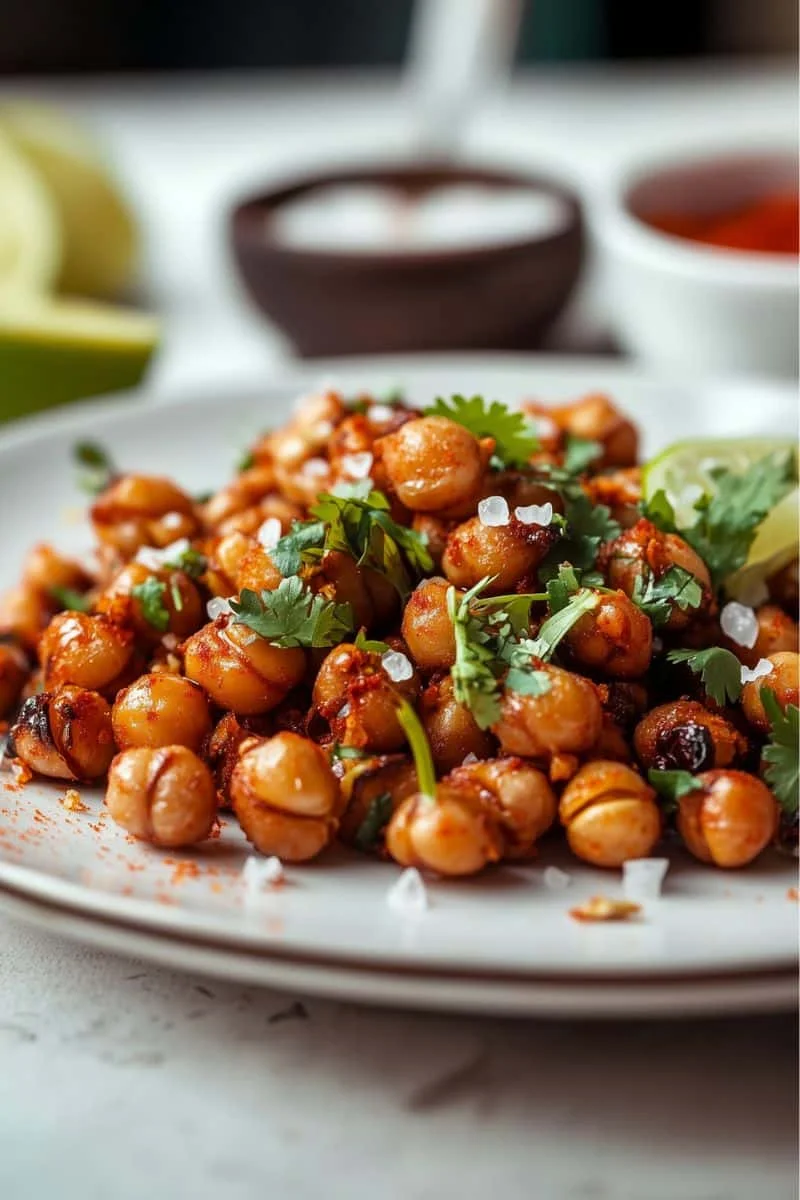
Lime & Chili Roasted Chickpeas are an incredibly crunchy and addictive Mexican snack. These zesty, spicy chickpeas are remarkably easy to prepare and bursting with flavor. They are perfectly seasoned and roasted until golden for an irresistible crunch.
Ingredients
- 1 (15 oz) can chickpeas (garbanzo beans), rinsed, drained, and thoroughly patted dry
- 1 tablespoon olive oil
- 1 teaspoon chili powder (adjust to your spice level)
- 1/2 teaspoon ground cumin (optional, for earthy depth)
- 1/4 teaspoon garlic powder (optional)
- Salt to taste
- Zest of 1 lime
- 1 tablespoon fresh lime juice (from the zested lime, approximately 1/2 lime)
Instructions
- Preheat your oven to 400°F (200°C); line a large baking sheet with parchment paper.
- Ensure chickpeas are very dry: after rinsing and draining, pat them thoroughly with paper towels.
- In a medium bowl, toss the extremely dry chickpeas with the olive oil until evenly coated.
- Add chili powder, optional cumin, optional garlic powder, and salt; toss again to distribute spices.
- Spread the seasoned chickpeas in a single, even layer on the prepared baking sheet.
- Roast in the preheated oven for 20-30 minutes, shaking the pan once or twice during roasting.
- Chickpeas are done when golden brown, slightly shrunken, and crispy (test one after cooling slightly).
- Remove the baking sheet from the oven; let the chickpeas cool on the sheet for about 5 minutes.
- While still warm, transfer the roasted chickpeas to a clean mixing bowl.
- Add the fresh lime zest and fresh lime juice to the warm chickpeas.
- Toss immediately and thoroughly to coat the chickpeas evenly with the lime.
- Spread on a baking sheet to air dry for a few minutes if desired, then enjoy this crunchy snack.
13. Mango Salsa with Jalapeño & Lime (Sweet, Spicy & Addictive!)

Mango Salsa with Jalapeño & Lime is an incredibly sweet, spicy, and addictive delight. This vibrant, fresh fruit salsa bursts with tropical flavors and beautiful colors. It’s the perfect accompaniment for tortilla chips, grilled chicken, fish, or tacos.
Ingredients
- 2 ripe mangoes, peeled, pitted, and diced small
- 1/2 medium red onion, finely diced
- 1 jalapeño pepper, minced (seeds removed for milder heat, keep some for more spice)
- 1/2 cup chopped fresh cilantro
- Juice of 1-2 fresh limes (adjust to your taste and mango sweetness)
- A pinch of salt
- Optional: 1/2 red bell pepper, finely diced for added color and crunch
Instructions
- Carefully peel the ripe mangoes, remove the pits, and dice the flesh into small pieces.
- In a medium-sized mixing bowl, combine the diced mangoes with the finely diced red onion.
- Add the minced jalapeño pepper (adjust amount to your heat preference) and chopped cilantro.
- If you are using it, stir in the optional finely diced red bell pepper.
- Squeeze the fresh lime juice over the mango and vegetable mixture in the bowl.
- Season with a small pinch of salt to help bring out all the flavors.
- Gently toss all the salsa ingredients together until they are just combined.
- Be careful not to overmix, as this can make the mango pieces mushy.
- Taste the salsa and adjust seasonings if necessary (more lime, salt, or jalapeño).
- For the best flavor, cover the bowl and refrigerate for at least 15-30 minutes.
- Chilling allows all the sweet, spicy, and tangy flavors to meld together perfectly.
- Serve this addictive mango salsa with tortilla chips, on tacos, or alongside grilled dishes.
14. Mexican Ceviche with Fresh Fish & Citrus (No Cook & Beach-Ready!)

Mexican Ceviche with Fresh Fish & Citrus is a perfectly no-cook, beach-ready delight. This vibrant dish features fresh fish “cooked” solely in a tangy lime marinade. Mixed with crisp onions, juicy tomatoes, and cilantro, it’s bursting with zesty flavor.
Ingredients
- 1 lb fresh, high-quality firm white fish fillets (e.g., snapper, cod, sea bass, halibut), skinless, boneless, and diced into 1/2-inch pieces
- 3/4 – 1 cup freshly squeezed lime juice (enough to completely cover the fish)
- 1/2 medium red onion, finely diced or very thinly sliced
- 2 ripe plum tomatoes, seeded and diced
- 1-2 jalapeño or serrano peppers, minced (seeds removed for milder heat, optional)
- 1/2 cup chopped fresh cilantro leaves and tender stems
- Salt and freshly ground black pepper to taste
- Optional additions: 1/2 cucumber (peeled, seeded, diced); diced avocado (add just before serving)
- For serving: Crispy tortilla chips or tostadas
Instructions
- Dice the fresh, high-quality white fish into uniform 1/2-inch pieces.
- Place the diced fish in a non-reactive glass or ceramic bowl.
- Pour enough fresh lime juice over the fish to ensure all pieces are fully submerged.
- Cover the bowl and refrigerate for 30 minutes up to 2 hours.
- Marinate until the fish becomes opaque and firm, effectively “cooked” by the citrus.
- Once the fish is ready, gently drain off most, but not all, of the excess lime juice.
- Add the finely diced red onion, seeded and diced tomatoes, and minced peppers (if using).
- Stir in the freshly chopped cilantro into the marinated fish mixture.
- Season the ceviche carefully with salt and freshly ground black pepper to your taste.
- Gently mix all ingredients until well combined; avoid breaking up the fish.
- If using, fold in the optional diced cucumber now; add the optional avocado just before serving.
- Chill for an additional 15-30 minutes to allow flavors to meld; serve cold with chips.
15. Mexican Fruit Salad with Tajin & Lime (Juicy & Spicy-Sweet!)

Mexican Fruit Salad with Tajin & Lime is a truly juicy and spicy-sweet sensation. This vibrant street food classic features ripe mango, watermelon, and pineapple. Each piece is generously tossed in iconic chili lime seasoning and fresh lime juice.
Ingredients
- 2 cups mixed fresh ripe fruit, cubed (e.g., mango, watermelon, pineapple, jicama, cucumber, cantaloupe, orange)
- 1-2 tablespoons fresh lime juice (adjust to your taste)
- 1-2 teaspoons Tajín Clásico seasoning (or other chili lime powder; adjust to your preference)
- Optional: A tiny pinch of salt (especially if your chili lime seasoning is low sodium)
- Optional: A drizzle of chamoy sauce for an extra layer of tangy, sweet, and spicy flavor
Instructions
- Wash, peel (if necessary), and carefully chop your selection of ripe fruits into bite-sized cubes.
- Combine all the prepared cubed fruit in a large mixing bowl.
- Drizzle the fresh lime juice evenly over the mixed fruit pieces in the bowl.
- Generously sprinkle the Tajín Clásico seasoning (or your chosen chili lime powder) over the fruit.
- If you are using them, add an optional pinch of salt or a drizzle of chamoy sauce.
- Gently toss all the ingredients together until the fruit is well coated with lime and seasoning.
- Be careful during tossing to avoid mashing any softer fruit pieces like ripe mango.
- Taste a piece of the seasoned fruit and adjust lime juice or Tajín if needed.
- For enhanced flavor, let the fruit salad sit for about 5-10 minutes before serving.
- This allows the fruit juices to meld beautifully with the spicy-sweet seasoning.
- Serve this juicy Mexican fruit salad immediately on its own, or chilled for extra refreshment.
16. Mexican Pasta Salad with Black Beans & Cotija (Zesty & Picnic-Perfect!)
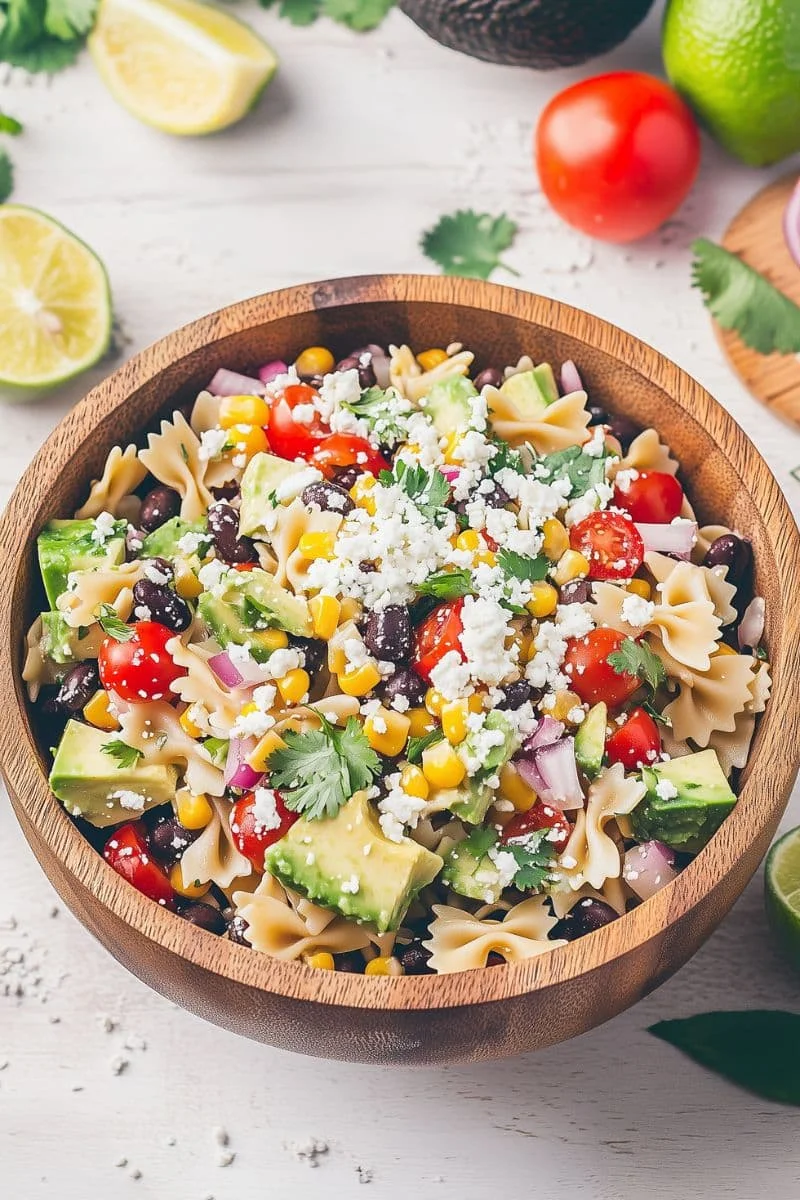
Mexican Pasta Salad with Black Beans & Cotija is a zesty and picnic-perfect dish. This vibrant, no-mayo pasta salad is bursting with bold Mexican flavors. It’s packed with fresh veggies, hearty black beans, and salty cotija cheese.
Ingredients
- 8 oz pasta (rotini, farfalle, or medium shells recommended), cooked al dente and cooled
- 1 (15 oz) can black beans, rinsed thoroughly and drained
- 1 cup corn kernels (frozen and thawed, canned and drained, or fresh roasted)
- 1 red bell pepper, finely diced
- 1/2 small red onion, finely diced
- 1/2 cup chopped fresh cilantro
- 1/2 cup crumbled cotija cheese (plus extra for garnish)
- 1/4 cup extra virgin olive oil
- 3 tablespoons fresh lime juice
- 1 teaspoon chili powder
- 1/2 teaspoon ground cumin
- 1/4 teaspoon garlic powder
- Salt and freshly ground black pepper to taste
- Optional: 1 teaspoon agave nectar or honey (to balance flavors)
Instructions
- Cook pasta according to package directions until al dente; rinse under cold water and drain well.
- In a large salad bowl, combine the cooled pasta, rinsed black beans, and corn kernels.
- Add the finely diced red bell pepper, finely diced red onion, and chopped fresh cilantro.
- Prepare dressing: In a separate small bowl, whisk olive oil, lime juice, and chili powder.
- Whisk in ground cumin, garlic powder, salt, pepper, and optional agave/honey until well blended.
- Pour the prepared zesty lime dressing over the pasta and vegetable mixture in a large bowl.
- Add most of the crumbled cotija cheese to the salad, reserving a bit for garnishing later.
- Toss all ingredients together gently until everything is well combined and evenly coated.
- Taste the Mexican pasta salad; adjust seasonings like salt, pepper, or lime juice if necessary.
- For optimal flavor, cover the salad and refrigerate for at least 30 minutes before serving.
- This allows all the zesty and bold Mexican flavors to meld together beautifully.
- Garnish with reserved crumbled cotija cheese and a sprinkle of fresh cilantro just before serving.
17. Pico de Gallo with Peach (Summer Twist on a Classic!)
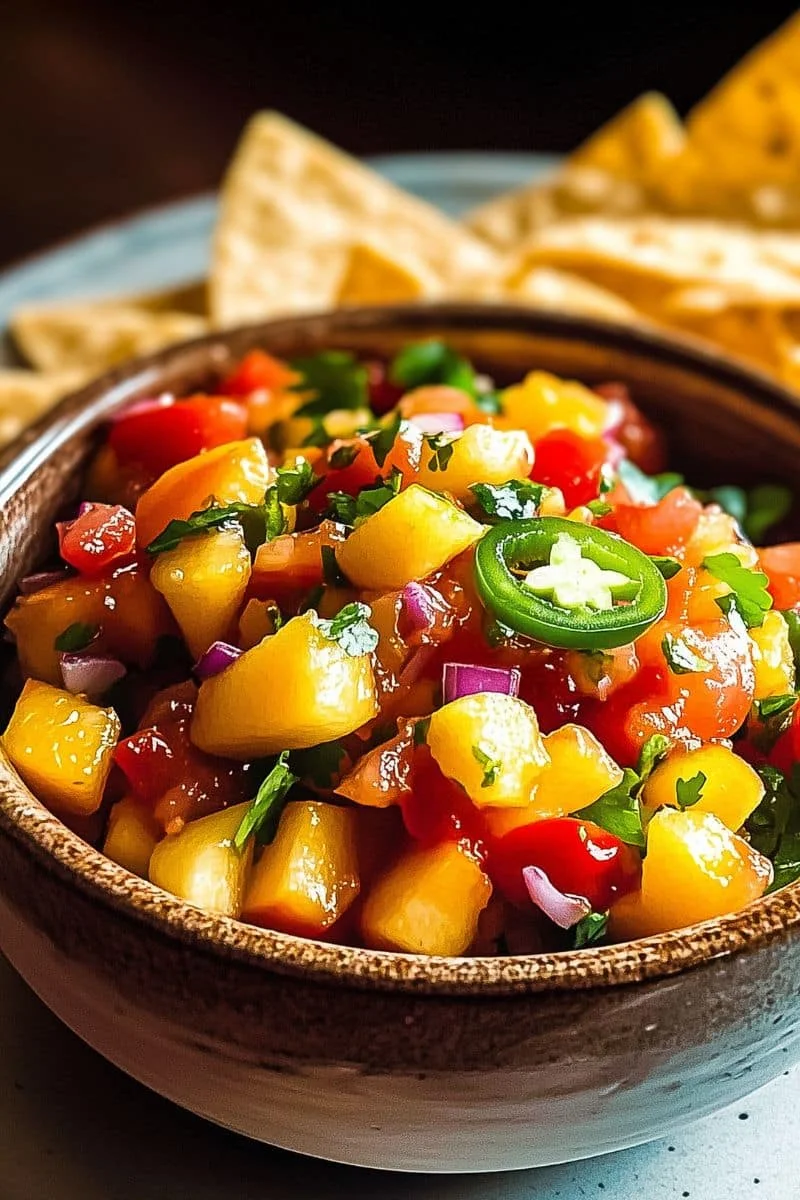
Pico de Gallo with Peach offers a delightful summer twist on a truly classic salsa. Juicy, sweet peaches are introduced to this chunky and wonderfully spicy condiment. It creates a refreshing balance perfect for topping grilled proteins or your favorite tacos.
Ingredients
- 2 ripe peaches, peeled (optional), pitted, and finely diced
- 1/2 small red onion, very finely diced
- 1 jalapeño pepper, minced (seeds removed for less heat, if preferred)
- 1/2 cup fresh cilantro, chopped
- Juice of 1 large lime (or more, to taste)
- Salt to taste
- Optional: 1/4 red bell pepper, finely diced for added crunch and color
Instructions
- Peel peaches if desired, remove pits, and finely dice the fruit into small, even pieces.
- In a medium mixing bowl, combine the finely diced peaches with the very finely diced red onion.
- Add the minced jalapeño pepper and the freshly chopped cilantro to the bowl.
- If you are using it, stir in the optional finely diced red bell pepper.
- Squeeze the fresh lime juice evenly over all the combined ingredients in the bowl.
- Season the mixture with salt according to your taste, starting with a small pinch.
- Gently mix all the components until they are just incorporated; do not overmix.
- Over-stirring can make the peaches too soft and the salsa mushy.
- Taste the pico de gallo and adjust the amount of lime juice or salt if necessary.
- For the best flavor profile, cover the bowl and chill for at least 15-20 minutes.
- This resting period allows the sweet, spicy, and savory notes to meld together beautifully.
- Serve this peach-infused pico de gallo as a fresh topping for grilled dishes or with chips.
18. Spicy Mango Chamoy Popsicles (Sweet, Tangy & TikTok Famous!)

Spicy Mango Chamoy Popsicles are a sweet, tangy, and TikTok-famous frozen sensation. These vibrant homemade paletas perfectly blend sweet mango, zesty chili, and savory chamoy. They deliver an irresistible “sweet heat” flavor combination that you’ll crave.
Ingredients
- 2 cups ripe mango chunks (fresh or frozen and slightly thawed)
- 1/4 cup chamoy sauce (plus extra for drizzling into molds, optional)
- 1-2 teaspoons Tajín Clásico seasoning (or other chili lime powder, adjust to taste)
- 2 tablespoons fresh lime juice
- 1/4 cup water or mango nectar (optional, if needed to help with blending)
- Optional: 1-2 tablespoons agave nectar or simple syrup (if mangoes are not very sweet)
- Popsicle molds and popsicle sticks
Instructions
- In a blender, combine the ripe mango chunks, fresh lime juice, and optional water/nectar.
- Add optional agave nectar or simple syrup if your mangoes require extra sweetness.
- Blend the mango mixture until it is completely smooth and has a puree consistency.
- Taste the mango puree; adjust the sweetness or lime juice if necessary at this point.
- Prepare your popsicle molds; if desired, drizzle a little chamoy inside each mold first.
- Also, if desired, lightly sprinkle some Tajín seasoning into the molds over the chamoy.
- Carefully pour the blended mango puree into each of the popsicle molds.
- Leave a little space at the top as the mixture will expand when frozen.
- You can optionally swirl a bit more chamoy or Tajín into the filled molds.
- Insert popsicle sticks into the center of each mold according to the mold design.
- Place the filled molds in the freezer for at least 4-6 hours, or until completely solid.
- To release, briefly run warm water over the outside of the molds; serve these paletas immediately.
19. Street Corn Salad (Esquites in a Bowl!)
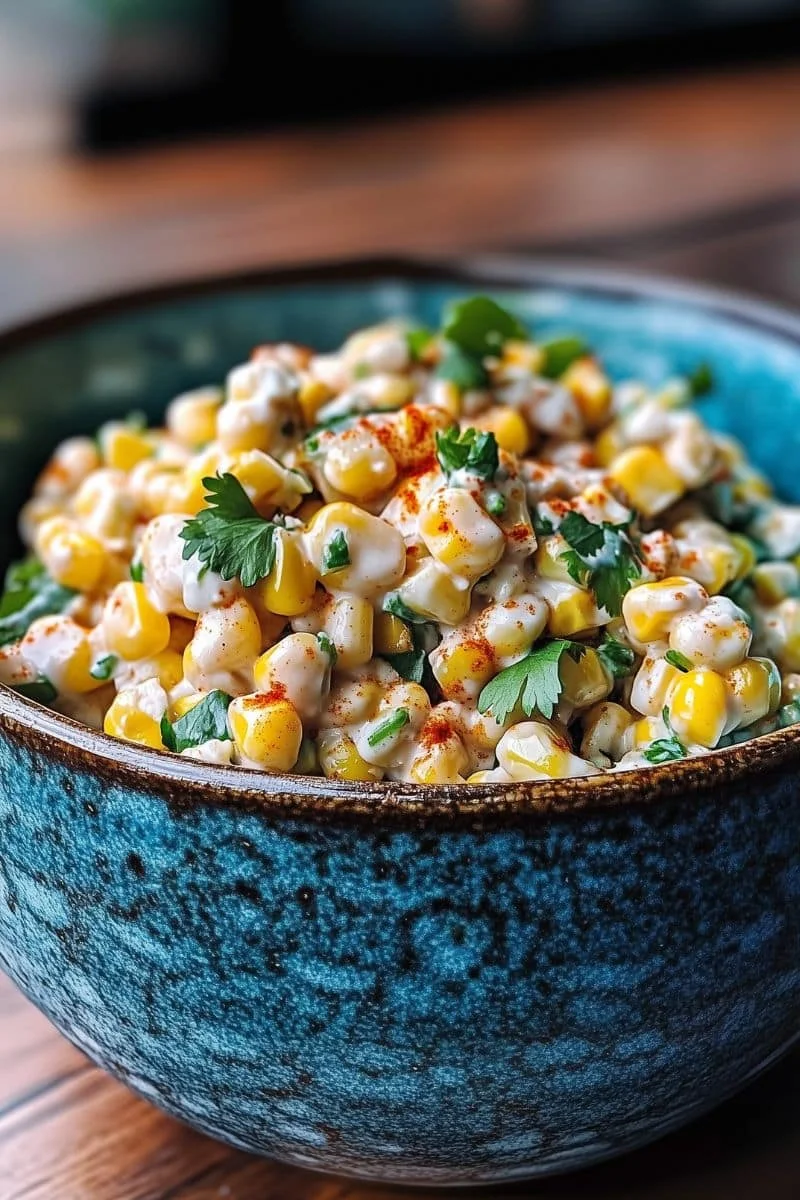
Street Corn Salad (Esquites in a Bowl!) brings all the iconic elite flavor without any mess. This creamy, vibrant corn salad has the true taste of a Mexican street food favorite. It’s packed with sweet charred corn, zesty lime, chili, and salty cotija cheese.
Ingredients
- 4 cups corn kernels (from about 4-5 fresh ears, or frozen, thawed, or canned, drained well)
- 2 tablespoons mayonnaise
- 1/4 cup crumbled cotija cheese (plus a little extra for garnish)
- 1-2 tablespoons fresh lime juice (to taste)
- 1/2 teaspoon chili powder (adjust to your spice preference)
- 1/4 cup chopped fresh cilantro
- Optional: 1 tablespoon butter (if pan-charring fresh/frozen corn), 1 small jalapeño (finely diced), 1/4 red onion (finely diced).
Instructions
- Cook corn: Grill fresh ears until charred, then cut kernels, or pan-char kernels in optional butter.
- If using frozen corn, thaw and cook; if canned, drain very well (char if desired).
- In a large mixing bowl, combine the warm (or cooled) cooked corn kernels.
- Add the mayonnaise, crumbled cotija cheese, fresh lime juice, and chili powder to the corn.
- Stir in the freshly chopped cilantro and any optional diced jalapeño or red onion.
- Mix all ingredients thoroughly until corn is evenly coated and creamy.
- Taste the street corn salad; adjust lime juice, chili powder, or salt if needed.
- This esquites salad can be served immediately while still slightly warm.
- Alternatively, cover and chill in the refrigerator for at least 20-30 minutes.
- Before serving, garnish with an extra sprinkle of cotija cheese and fresh cilantro.
- Enjoy this flavorful Mexican corn salad as a fantastic BBQ side or on its own.
20. Taco Stuffed Bell Peppers (Lighter & Meal Prep Approved!)
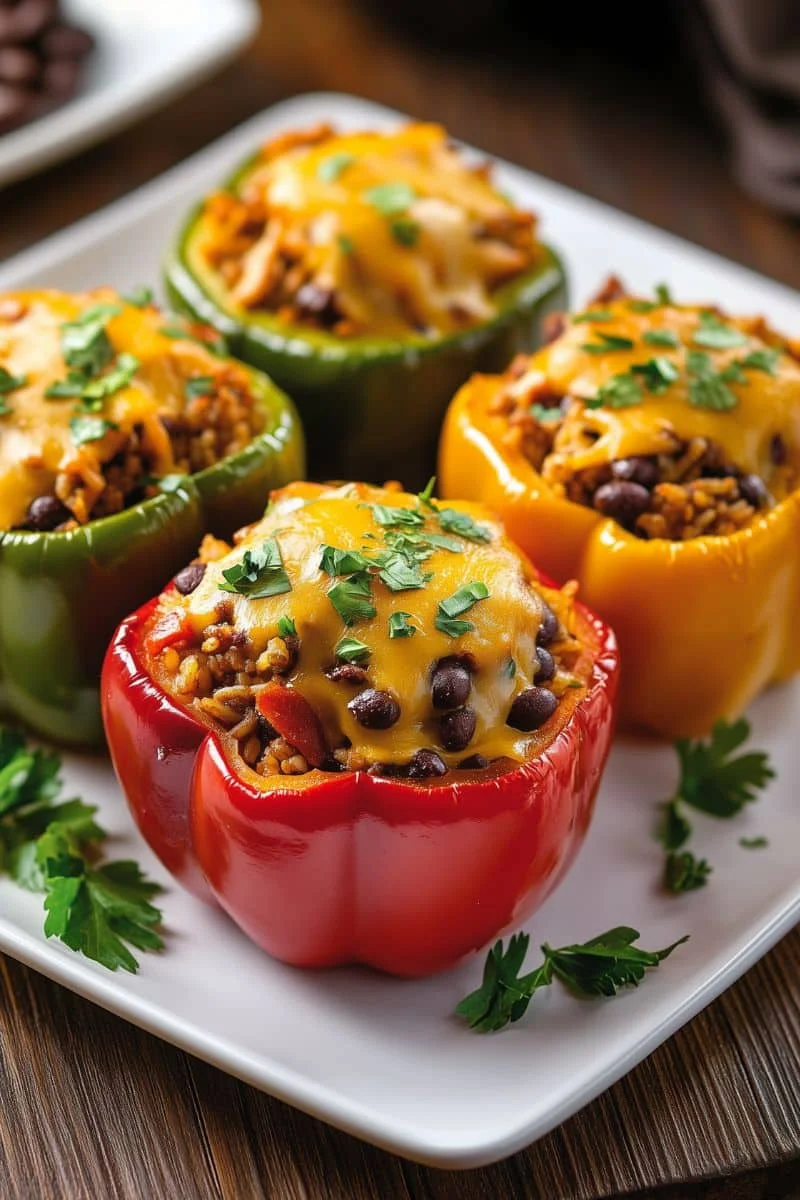
Taco Stuffed Bell Peppers offers a lighter, vibrant, and meal prep-approved option. Skip the traditional shell and stuff sweet bell peppers with savory taco-seasoned beef. They’re also packed with beans and cheese for a complete and satisfying meal.
Ingredients
- 4 medium bell peppers (any color), halved lengthwise and seeded
- 1 lb lean ground beef or turkey
- 1 packet (1 oz) taco seasoning mix (or 2-3 tablespoons homemade)
- 2/3 cup water or beef broth
- 1 (15 oz) can black beans, rinsed and drained (optional)
- 1 cup shredded cheddar or Mexican blend cheese, divided
- Optional toppings: Sour cream or Greek yogurt, salsa, chopped cilantro, diced avocado.
Instructions
- Preheat your oven to 375°F (190°C); arrange pepper halves in a baking dish.
- In a large skillet, cook ground beef or turkey over medium heat until browned; drain fat.
- Stir in the taco seasoning mix and water or beef broth to the cooked meat.
- Bring mixture to a simmer; cook for 5-7 minutes, or until sauce has thickened slightly.
- If using, stir in the rinsed and drained black beans to the meat mixture.
- Stir half (1/2 cup) of the shredded cheese into the taco meat filling.
- Spoon the prepared taco filling evenly into each of the bell pepper halves.
- Pour about 1/4 cup of water into the bottom of the baking dish around the peppers.
- Cover baking dish with foil; bake for 25-30 minutes, or until peppers are tender-crisp.
- Remove foil; sprinkle the remaining 1/2 cup of shredded cheese over the peppers.
- Bake uncovered for another 5-10 minutes, until cheese is melted and bubbly.
- Serve these taco-stuffed bell peppers warm with your favorite taco toppings.
21. Tomatillo Avocado Salsa (Creamy & Tangy Green Salsa!)
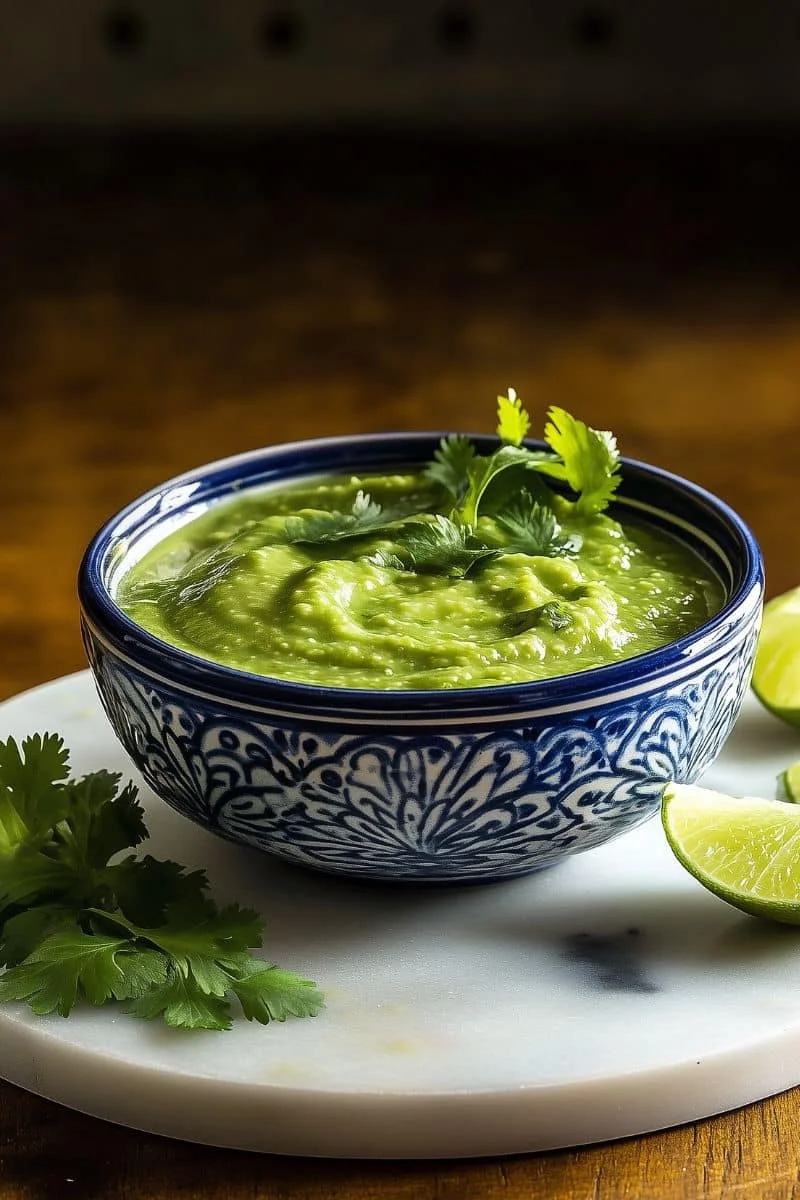
Tomatillo Avocado Salsa offers a wonderfully creamy and tangy green salsa experience. This vibrant dip beautifully blends the tartness of fresh tomatillos with rich avocado. It’s a smooth, flavorful, and refreshing alternative to traditional red salsas.
Ingredients
- 1/2 lb fresh tomatillos (approximately 4-5 medium-sized), husks removed and rinsed well
- 1 ripe avocado, halved, pitted, and flesh scooped out
- 1/2 small white onion, roughly chopped (or 2-3 green onions, chopped)
- 1-2 jalapeño or serrano peppers, stemmed (seeds removed for milder heat, optional)
- 1/2 cup fresh cilantro leaves and tender stems, loosely packed
- Juice of 1 fresh lime (or more to taste)
- Salt to taste
- Optional: 1 small clove of garlic, roughly chopped
Instructions
- Remove the papery husks from the tomatillos; rinse them thoroughly under cool water.
- Roughly chop the rinsed tomatillos, white onion (or green onions), and jalapeño/serrano peppers.
- Place the scooped avocado flesh into a blender or food processor.
- Add the chopped tomatillos, onion, peppers, fresh cilantro, and optional garlic to the blender.
- Squeeze the fresh lime juice over all the ingredients in the blender.
- Season with salt to your preference, starting with about 1/4 to 1/2 teaspoon.
- Secure the lid firmly on the blender or food processor.
- Blend the mixture until it reaches your desired consistency – smooth for a creamy salsa or pulse for chunkier.
- Taste the tomatillo avocado salsa; adjust salt or lime juice levels if necessary.
- If the salsa is thicker than you prefer, add a tablespoon of cold water and blend briefly.
- Transfer the finished green salsa to a serving bowl.
- For the best flavor, chill for 15-30 minutes before serving with chips or Mexican dishes.
22. Watermelon Mint Agua Fresca (Hydrating & Refreshing!)

Watermelon Mint Agua Fresca is an incredibly hydrating and refreshing summer beverage. This light, fruity drink is naturally sweet and perfect for cooling off on hot afternoons. It beautifully combines juicy watermelon with the cool essence of fresh mint leaves.
Ingredients
- 4 cups cubed seedless watermelon, chilled
- 1/4 cup fresh mint leaves, lightly packed
- 2 cups cold filtered water (adjust to your preferred consistency)
- Juice of 1/2 fresh lime (optional, for an extra touch of zest)
- Optional: 1-2 teaspoons agave nectar or simple syrup (if your watermelon isn’t very sweet)
- Ice cubes, for serving
- Fresh mint sprigs and small watermelon wedges for garnish (optional)
Instructions
- Place the chilled, cubed seedless watermelon and fresh mint leaves into a blender.
- Pour in the cold filtered water and the optional fresh lime juice.
- If desired for added sweetness, add agave nectar or simple syrup at this point.
- Secure the blender lid firmly to prevent any splashing during blending.
- Blend on high speed for approximately 30 to 60 seconds until completely smooth.
- For an ultra-smooth agua fresca, pour the mixture through a fine-mesh sieve into a pitcher.
- Gently press on any solids in the sieve to extract all liquid; discard the remaining pulp.
- If you prefer more fiber, you can skip the straining step entirely.
- Taste the watermelon mint agua fresca; adjust lime juice or sweetener if needed.
- Fill serving glasses generously with ice cubes to ensure they’re well-chilled.
- Pour the prepared agua fresca from the pitcher over the ice in the glasses.
- Garnish with fresh mint sprigs or small watermelon wedges, if desired, and serve immediately.
Conclusion
With these 22 inspiring Summer Mexican recipes, your warm-weather gatherings are set to be more flavorful and festive than ever. From refreshing starters and satisfying mains to delightful desserts, the vibrant tastes of Mexico are the perfect accompaniment to sunny days and balmy evenings.
I am now ready for you to provide the images and short descriptions for each of the 22 menu items so I can build Part 2 according to your detailed instructions.
Made this recipe?
Leave a rating and a comment below — it helps other cooks — and pin it so you can find it again.

Agrita Chhibber Editor
More breakfast recipes you'll love
 20 minBreakfastCrab Omelet Recipe
 51 hr 15 minBreakfastManna Bread Recipe
 3 hrBreakfastIrish White Pudding Recipe
 20 minBreakfastPaula Deen Heart Attack Burger Recipe
 Breakfast20 Healthy Low Carb Breakfast Ideas for Families on the Go
 25 minBreakfastHow To Make Pan-Fried Monchong At Home
 25 minBreakfastMcDonald’s Sausage And Egg McMuffin Copycat Recipe
 2 hr 25 minBreakfastHomemade Beef Salami-Style Summer Sausage Recipe